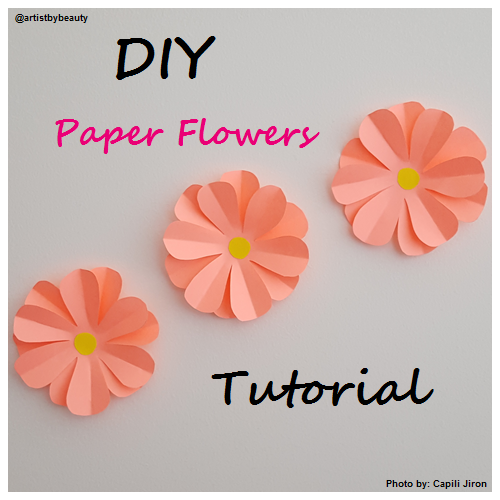
Flowers are so beautiful, and brighten up any area that they are placed within.
I love nature so much! Flowers are one thing that I love to incorporate into my art work. You may have noticed that when I do reviews on products, I like to add paper flowers just make the background look pretty, and brighten up the look.
I make my own paper flowers, and will now show you how you can make them as well.
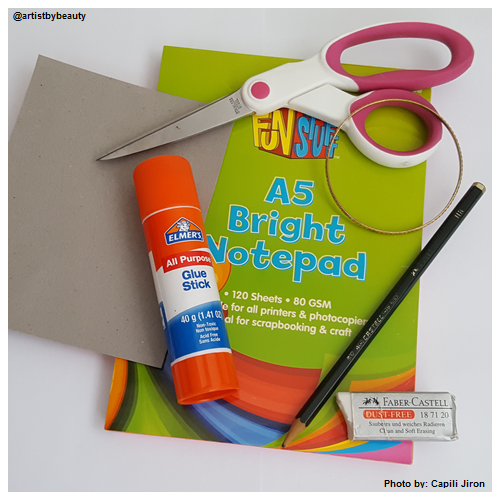 Materials you will need:
- A piece of cardboard (not too thick).
- Scissors.
- A glue stick.
- An eraser.
- A graphite pencil (a HB pencil is fine).
- Two different colours of colour paper.
- A bangle (or something that you can trace a circle with, you may want to use a cup).
* You may want to use a ruler where straight lines are required (if you are not confident drawing lines).
Here are the steps:
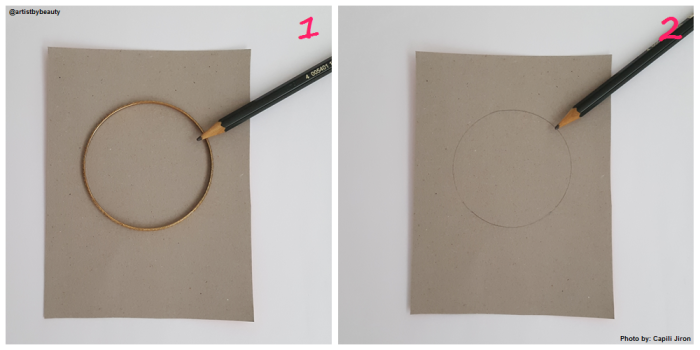 Step 1 – Place the bangle on the piece of cardboard.
Step 2 – Trace a circle using a pencil.
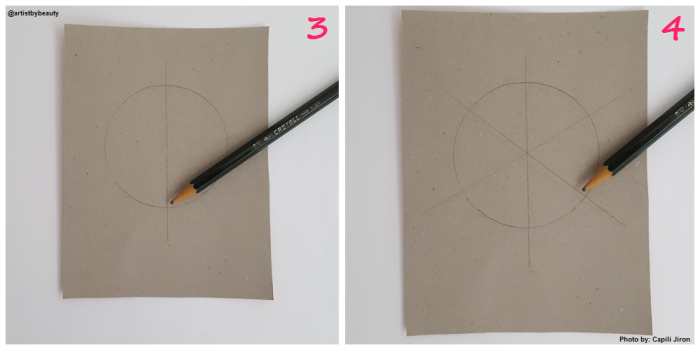 Step 3 – Draw a line straight down the circle (you can use a ruler for this).
Step 4 – Draw two more lines as per picture above.
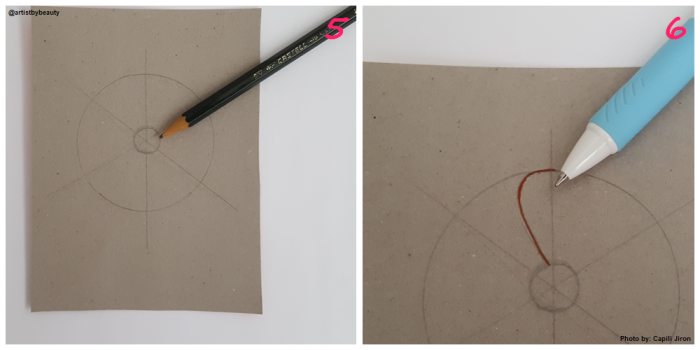 Step 5 – Draw a small circle in the centre of the large circle.
Step 6 – Using a pencil draw half of the petal shape as per picture above (I have used a red pen just so you can see the shape better).
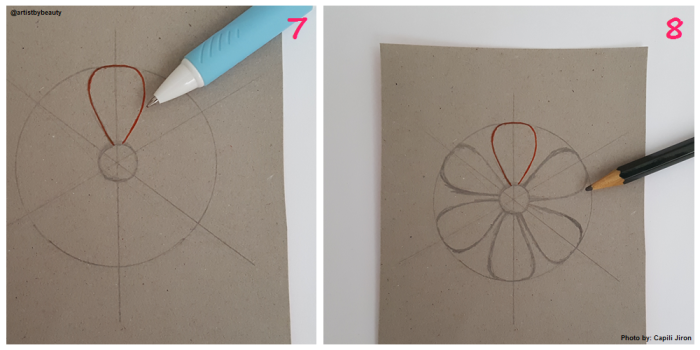 Step 7 – Complete the petal as per picture above.
Step 8 – Draw the rest of the petals as per picture above.
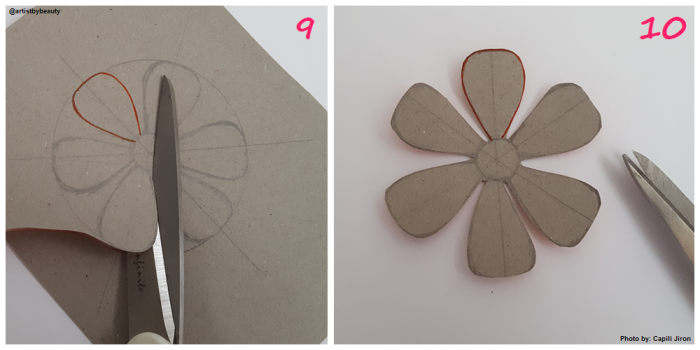 Step 9 – Carefully cut out the flower shape.
Step 10 – You can tidy the petals more as you want with scissors.
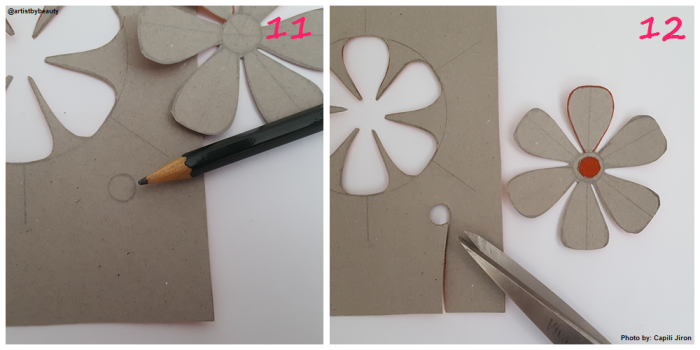 Step 11 – Using a pencil draw a small circle (small enough to fit in the middle of the flower).
Step 12 – Cut out the small circle using scissors (I have coloured my small circle red so you can see how big it should be compared to the flower).
 Step 13 – Grab a piece of colour paper and use a pencil to trace around the cardboard flower shape. You need to trace two flower shapes to make one flower.
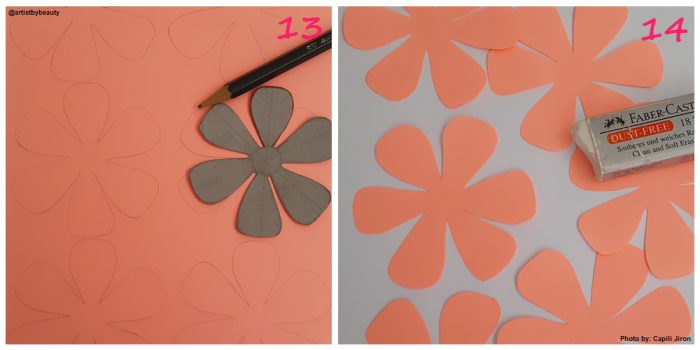
Step 14 – Carefully cut out the flower shapes, and very carefully erase any pencil markings (if required).
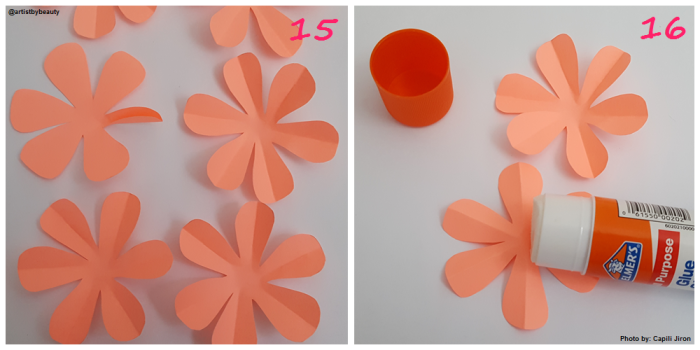 Step 15 – Carefully fold each individual petal in half (inwards the top of the flower cut out) to crease a line.
Step 16 – Take two flower cut outs, flip one over, and glue only the centre on the back of the flower cut out.
 Step 17 – Flip back the glued flower cut out, and pace on top of the other flower cut out (ensure that you align the flower cut outs as per the above picture, so that you can see the petals from the bottom flower cut out, peeking through). Apply pressure to the centre of the flower cut out to ensure the glue sticks well.
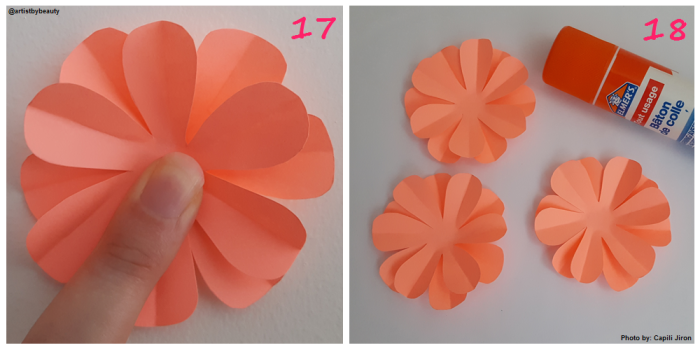
Step 18 – Set aside the flowers to dry, it will not take them long (maybe a minute or two).
 Step 19 – Take the small circle cardboard cut out, and trace a circle for each flower on different colour paper.
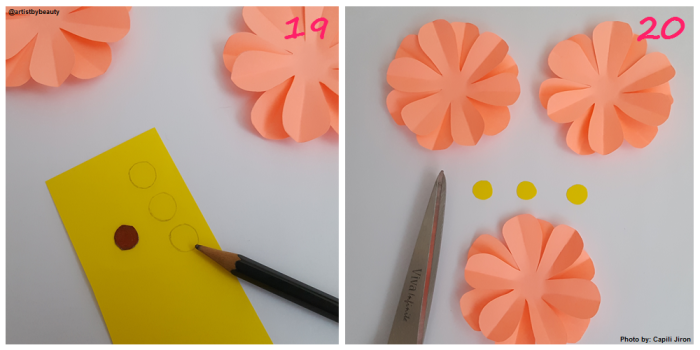
Step 20 – Carefully cut out each small circle.
 Step 21 – Glue each small circle onto the centre of each flower.
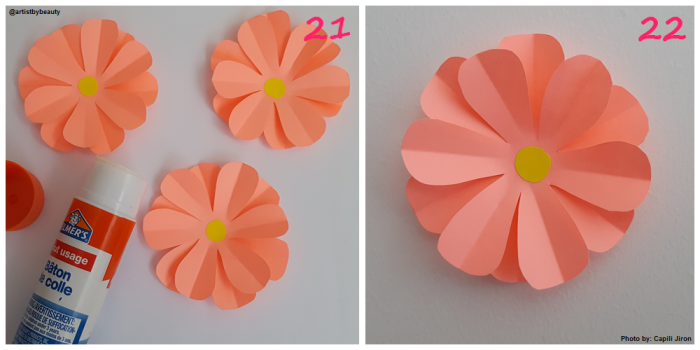
Step 22 – Your pretty paper flowers should look like the above picture.
I love these paper flowers so much! You can make them with as many petals as you want. They are also great for decor on walls or frames. Do with them what you like 🙂 🙂
Thank you so much for reading. This is my first blog tutorial. I have all sorts of tutorials planned for my blog, such as: cooking, sewing, drawing, and so much more. Please let me know if you found this tutorial easy to follow.
Have a beautiful day!
Capili Jiron x x

Yes it is easy to follow.these flowers are pretty.I’m gonna try making a few 😊😊
LikeLiked by 2 people
Yay I’m so happy to hear that 🙂 🙂 Thank you so much x x
LikeLiked by 1 person
You’re welcome
LikeLiked by 2 people
🙂 🙂 x x
LikeLike
Amazing DIY post!!! And yes,it is super easy to follow!!!!! I liked these flowers…Gotta make mine soon!!!
LikeLiked by 3 people
Thank you very much 🙂 🙂 Yay, I’m glad to hear that dear ❤ ❤ x x
LikeLiked by 1 person
Wow pretty
LikeLiked by 2 people
Thank you 🙂 🙂 I love making them x x
LikeLiked by 1 person
Such a kool DIY!! The flowers are so pretty.. I just need to grab some patience to cut out everything evenly..hahaha
LikeLiked by 2 people
Thank you very much 🙂 🙂 Yes, cutting out always takes the longest, and can be annoying lol ❤ ❤ x x
LikeLiked by 1 person
This is so cute! Love how you put them in the background! xx
LikeLiked by 2 people
Thank you lovely 🙂 🙂 Yes, they are a nice touch to backgrounds x x
LikeLiked by 1 person
Amazing DIY tutorial post! Yes, it was really easy to follow! The flowers are so pretty & cute! I’m going to try it out as soon as I can! Great post – as usual! Enjoyed it all! ❤️ ❤️❤️ ❤️
LikeLiked by 2 people
Thank you dear ❤ ❤ I'm so glad you found it easy to follow. Yay, thats exciting 🙂 🙂 I'm sure you will do great at it x x
LikeLiked by 1 person
This is so cool! I love your DIY posts 🙂 Really enjoyed reading this!x
LikeLiked by 2 people
Yay, thank you so much 🙂 🙂 That makes me so happy to hear ❤ ❤ x x
LikeLiked by 1 person
Such a fun DIY Capili! Simple, fast and beautiful! Just the way I like it! xoxo Sarah
LikeLiked by 2 people
Yay thank you for the wonderful comment Sarah 🙂 🙂 I’m so happy to hear that ❤ ❤ x x
LikeLike
This is so cool and thanks for putting in steps! I will definitely have to try this out! 😄
LikeLiked by 2 people
Aww thank you beautiful 🙂 🙂 Yay, I’m sure you will do great ❤ ❤ x x
LikeLiked by 1 person
so cute !!!!!!!!!!!!!!!!!!!
i love xo
LikeLiked by 2 people
Thank you so much lovely 🙂 🙂 x x
LikeLike
i’ve been looking for pages like this for so long!
amazing work ❤ you’re one of my favourites now
LikeLiked by 2 people
Aww thank you so much 🙂 🙂 That’s lovely to know dear ❤ ❤ x x
LikeLiked by 1 person
Wow! I would love to try these 🙂 You are so talented ❤ ❤
LikeLiked by 2 people
Thank you so much 🙂 🙂 x x
LikeLiked by 1 person
Thank you so much for this DIY Capili ! I was waiting for this tutorial!! I’m definitely going to try it out and let you know dear<3 ❤
LikeLiked by 2 people
Your welcome lovely 🙂 🙂 I’m sure you will do great at it x x
LikeLiked by 1 person
Beautiful. .I will also try!
LikeLiked by 1 person
Thank you so much 🙂 🙂 Yay x x
LikeLiked by 1 person
☺
LikeLiked by 1 person
Super cool!!
LikeLiked by 1 person
Thank you so much dear 🙂 🙂 ❤ ❤ x x
LikeLiked by 1 person
The flowers are so cute! The steps are really clear and well written xx
LikeLiked by 1 person
Thank you 🙂 🙂 I’m so happy to hear that dear x x
LikeLiked by 1 person
Wow, you make the job seem so effortless!
LikeLiked by 1 person
Aww thank you so much, that’s so nice to know 🙂 🙂 x x
LikeLiked by 1 person
0_000
Man that looks so pretty Capili! I did wonder how you make them! ❤
LikeLiked by 1 person
Aww thank you so much 🙂 🙂 I love making them. Easy to make, and look so cute x x
LikeLiked by 1 person
Reblogged this on Artist by beauty.
LikeLike
I love this ! i should try it for sure !
LikeLiked by 1 person
Thank you ❤ ❤ Yay, they look so cute, and look good on many things 🙂 🙂 x x
LikeLike